R
Ryuumi Lifestyle
|
The Road to Building a Custom Leverless Controller with a 3D Printer: Prototyping and Limits with the Adventurer 3
The Hurdle of Large Enclosure Printing and the Decision to Upgrade to the Next-Gen 'P2S Combo'

The Road to Building a Custom Leverless Controller with a 3D Printer: Prototyping and Limits with the Adventurer 3

Motivations and the First Step Toward a Custom Leverless Controller

I bought SF6 on sale and started playing it, initially using an Xbox Elite Wireless Controller Series 2. However, I soon felt the urge to use a dedicated device to truly experience fighting games. That's when I set my sights on the 'leverless controller,' which has recently become mainstream in the pro scene.

At first, I considered buying a commercial product or semi-ordering an acrylic case from a manufacturer. But my gadget-geek blood began to boil. If I utilized my 3D printer, the 'Adventurer 3,' which was gathering dust in the corner of my room, couldn't I create the 'ultimate one-off machine' perfectly tailored to my hands, from the enclosure design to the button layout?

The greatest thrill of a complete DIY build is the ability to pursue 'actual usability' that cannot be measured by numbers on a spec sheet. You have total control over everything: the thickness of the enclosure, the millimeter-level clearance between buttons, and the angle of the palm rest. That said, it's also true that it requires an overwhelming amount of effort and trial and error compared to commercial or semi-ordered products. Below is a comparison table I put together before starting.

ApproachProsCons (Concerns)Estimated Cost
Buy Commercial LeverlessReady to use, stable quality, comes with warrantyCannot fine-tune button layout, uniform designApprox. 30k-50k JPY
Order Acrylic from VendorSome degree of freedom, beautiful finishHigh difficulty in creating blueprints, costs incur per revisionApprox. 20k-40k JPY
Full 3D Printer DIYMillimeter-level layout adjustments, cheap revision costsMassive trial & error, dependent on printing environmentApprox. 10k-20k JPY (*excluding printer cost)

As is clear from this comparison, building it yourself is a choice to gain 'infinite customizability' at the expense of 'time and effort.' Thus, an epic DIY project—what you might call a thorny path—began.

Prototyping with the Adventurer 3 and the '150mm Wall'

To stabilize a leverless controller on your lap, a footprint of at least 300mm in width and 200mm in depth is required. However, this is where the first physical wall stood in my way. The maximum build volume of my beloved Adventurer 3 is 150 × 150 × 150 mm. No matter how hard I tried, it was impossible to print the ideal enclosure in one go.

To bypass this limitation, I adopted a design approach in my CAD software to split the enclosure into four cross-sections. On the screen, the 3D model was a beautiful piece of data where each part fit together perfectly like a puzzle. I added dowel-like joint mechanisms to the split surfaces, and in theory, it was supposed to function as a single, robust controller.

However, this was nothing more than an 'armchair theory.' At this point, I was overly confident, thinking, 'As long as I split it, I can make any large device.' But I completely underestimated the thermal shrinkage and material characteristics (PLA/PETG) in actual 3D printing. There was a cruel, irreversible gap between the design data and the physical print results.

Prolonged Print Times and Dimensional Distortion from Thermal Shrinkage

Right after throwing the completed design data into the slicer software and starting the print, an unimaginably harsh reality bared its fangs. Even though the enclosure was split into four, each part was right at the limit of the build plate's size. Printing just a single part demanded an absurd amount of time—over 8 hours.

Just gathering the four parts melted away several days, and if there was even a 1mm mistake in the design, it meant falling into a hellish loop of waiting days for another print. At this rate, let alone iterating on the development, even maintaining motivation was in jeopardy. What was even more fatal was the 'accumulation of distortion' caused by minute thermal shrinkage during layer deposition.

When I finally tried to assemble the four parts that took days to print, severe dimensional tolerance deviations had occurred, resulting in gaps and steps of several millimeters at the joints. Ultimately, to maintain structural rigidity, it ended up in a disastrous state where I had to forcefully temporarily fix it from the back with duct tape. It was far from a quality that could withstand intense command inputs; all I had was a clumsy, flimsy prototype.

Print Failures Due to Aging and the Nightmare of Spaghettification

What made the harsh printing environment even worse was the severe aging of the machine itself. My Adventurer 3, with over 2,000 hours of total operation time, had unstable nozzle temperature behavior, and the extrusion accuracy of the extruder had clearly degraded.

Especially in large prints that used the build plate right to the edge, peeling and warping from the bed due to thermal shrinkage occurred frequently. Around the precise circular holes meant for fitting arcade buttons, fatal errors such as resin sagging and layer shifting became prominent due to decreased adhesion between layers and insufficient support in bridge sections.

Since one part took 8 hours, I had no choice but to rely on 'overnight printing' while I slept. However, when I looked into the printer the next morning with high hopes, I was met with a despairing sight: not a finished product, but a massive, cruelly tangled blob of plastic (spaghetti). Considering the hassle of setup and the frequency of maintenance, operating with an older generation machine had reached its absolute limit.

Comparing Old and New 3D Printer Development Environments and the Decision to Upgrade

Weighing the repeated print failures against the massive amount of lost time, I decided to withdraw from building large enclosures with the Adventurer 3. To continue refining the leverless controller and tackle more advanced gadget making in the future, a fundamental overhaul of the development environment was inevitable. That's when I set my sights on Bambu Lab's latest high-speed enclosed 3D printer, the 'P2S Combo.'

Take a look at the comparison table below. The significant expansion in build volume makes the fragile 4-split design a thing of the past, enabling a much more robust design approach. Furthermore, the overwhelming print speed and AI-powered failure detection features provide specs that completely wipe out the 'time costs' and 'mental stress' I suffered with the older generation machine.

Evaluation ItemOld Environment (Adventurer 3)New Environment (P2S Combo)Pros & Cons in Actual Use
Max Build Volume150 × 150 × 150 mm256 × 256 × 256 mm[Pro] Increased rigidity by reducing splits.
[Con] Requires securing installation space.
Enclosure Split Design4 splits (high distortion/low strength)2 splits (improved strength/modularizable)[Pro] Drastic reduction in joint misalignment, vastly improved finish.
Print SpeedSlow (over 8 hours for a single part)Max 600 mm/s (approx. 2 hours for the same size)[Pro] Overwhelming time savings speed up iteration.
Failure DetectionNone (frequent print failures)AI-powered Fail Detection (spaghetti detection, etc.)[Pro] Peace of mind for overnight printing.
[Con] Rare false positives from the camera.

Thanks to this dramatic change in environment, I was freed from the complexities of setup, and the foundation was laid to fully commit to my original goal: 'building the ideal controller.'

New Design with the Next-Gen Machine and an Early Look at Prototype No. 1

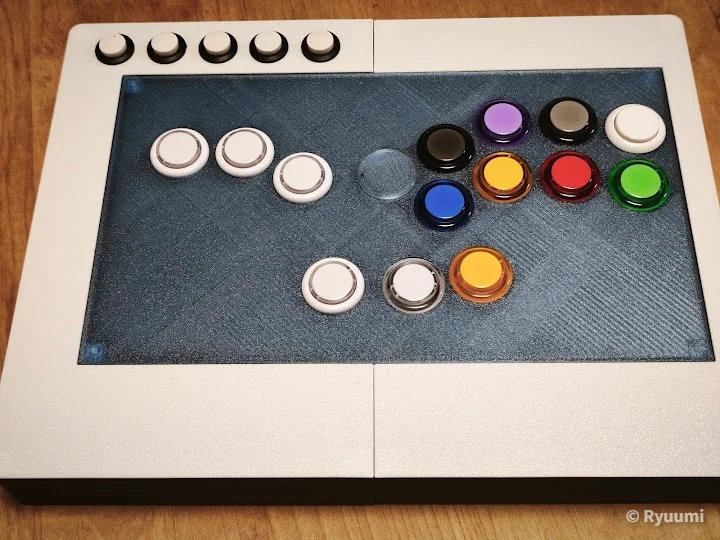
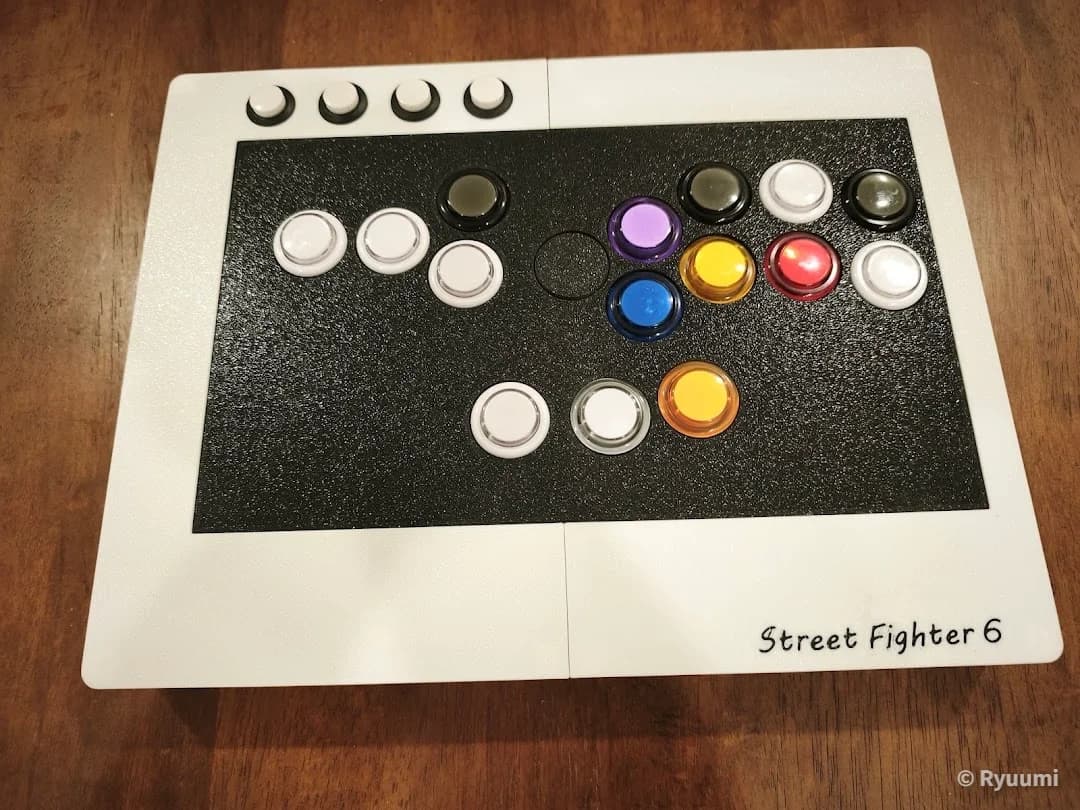
By introducing the P2S Combo, I gained a vast build volume of 256 × 256 × 256 mm, which allowed me to fundamentally overturn my enclosure design philosophy. I completely discarded the old, easily distorted, and fragile 4-split design, evolving into a left-right 2-split structure that minimizes the risk of deformation during printing while ensuring sufficient joint rigidity.

What is even more noteworthy is the adoption of a modular design with future button layout changes in mind. I physically separated the button layout section of the top panel from the main frame, incorporating a structure where it is installed as an independent inset module. As a result, even if I want to fine-tune the button layout by a millimeter, I only need to reprint the small central top panel part. This achieves extremely high maintainability and expandability that competing commercial products cannot imitate.

This time, I focused on the background of my decision to build it myself and the blood, sweat, and tears I shed in the old environment. In future articles, I will finally dive into the detailed specs of 'Prototype No. 1,' built using this P2S Combo, and the behind-the-scenes of the rigorous wiring work using a Raspberry Pi Pico. For now, please take an early look at the proud figure of Prototype No. 1, which took shape after much hardship.

The First Step in DIY is Knowing the Limits of Your Environment

My passion for the ultimate leverless controller was once derailed by the cruel reality of the physical constraints and aging of my beloved Adventurer 3. However, this very setback triggered the introduction of the state-of-the-art 'P2S Combo,' opening the door to more advanced design and comfortable manufacturing. Next time, I will cut sharply into the detailed production process and actual usability of Prototype No. 1, born in this new environment.

Related Articles

Building the Custom Leverless Controller Unit 02! The Ultimate Customization Based on Lessons from Unit 01
Tech

Building the Custom Leverless Controller Unit 02! The Ultimate Customization Based on Lessons from Unit 01

The first custom leverless controller was built using a 3D printer. However, putting it into actual combat revealed harsh realities like 'poor maintainability' and 'lack of rigidity.' In this article, we thoroughly identify the flaws of Unit 01 and introduce the redesigned 'Unit 02.'

8
Read
Why I Decided to Upgrade from the FlashForge Adventurer 3 to the Bambu Lab P2S Combo
Tech

Why I Decided to Upgrade from the FlashForge Adventurer 3 to the Bambu Lab P2S Combo

Facing the limits of my long-loved Adventurer 3, I decided to make the leap to the Bambu Lab P2S Combo. This comprehensive guide explores how it resolves the 'real-world operational stress' that doesn't show up on spec sheets, complete with a thorough comparison against competing machines.

8 min read
Read
Is the F1 Honda PU Okay? Decoding Aston Martin's Current Position from the 2026 Season Opener Telemetry
Tech

Is the F1 Honda PU Okay? Decoding Aston Martin's Current Position from the 2026 Season Opener Telemetry

What is the cause of Aston Martin Honda's severe slump? We compared them with Mercedes and Audi using official F1 telemetry to calculate how much power is being restricted and how much time could be gained once the issues are resolved.

8 min read
Read